Marijuana can be grown variously, but one of the most advanced systems is hydroponic grow of marijuana. The following article is based on a tutorial which synthesizes every necessary step to perform a perfect hydroponic crop. It’s one of the most productive systems with the best quality results. This happens because of its root system, superior to soil crop, so it provides better vegetative growing and kind of unbeatable final production.
- 1 How does it work?
- 2 What are its origins?
- 3 How does it work? Guide for marijuana hydroponic grow. Which soil is needed?
- 4 What do we need?
- 5 What are the necessary steps?
- 6 How to assemble the automatic irrigation system?
- 7 Micro tube assembling
- 8 How to assemble the sewage system?
- 9 Results
- 10 Growing/Flowering chart: EC, PH, Temperature and Humidity
- 11 Nutrients for marijuana hydroponic grow
- 12 PH
- 13 How to assemble home-made hydroponic marijuana system (video)
- 14 Conclusion
How does it work?
This system’s used for plant growing, by means of mineral dissolutions instead of agricultural soil. Etymologically, the word surges from Greek words ὕδωρ [hýdōr] = ‘water’, and πόνος [ponos] = ‘work’. Summing up, the roots receive a stabilized, nourished solution, dissolved in water and with all the chemical products which are essential for the proper functioning of the vital cycles of the plant. Regarding the solution in which the plants will grow, it can be a sole mineral solution, or an inert mean, like washed sand, gravel, coir or perlite.
What are its origins?
The origins of hydroponic grow date back to 382 B.C. This cropping technique was firstly used by the Aztecs. It was successfully performed by means of a chinampa, and it occupied the whole extension of Texcoco lake. The Romans also used this technique; precisely, the emperor Tiberius introduced cucumber hydroponic crop in I c. B.C.
Since the first human civilizations, hydroponic crop was used, and it had been constantly evolving. The first known piece of written information dates back to 1600, when the Belgian Jan van Helmont started to document his experiences on how the plants obtain their nutrients through water. In XVII c., the first public research on ground plants without soil appeared, the famous Francis Bacon’s Sylva Sylvarum.
Since then, from XVII to XIX c., a great amount of related research appeared. In XX c., William Frederick Gericke, professor of California University in Berkeley, published the first project where hydroponic crops for vegetal agricultural production were suggested. Their experiments with tomatoes showed that it was a proper solution to improve production and satisfy the high food orderings of the new demographic situation. Lastly, William F. Gericke’s the founder of modern hydroponics.
How does it work? Guide for marijuana hydroponic grow. Which soil is needed?
Modern hydroponics is an artificial cropping system, although not anti-natural, since it’s based on the same principles nature has established as life pattern. That is to say, when cropping with a hydroponic system, we’re just using a resource nature usually uses.
In order to start with your hydroponic crop, you have to take into account that your plants will live in an inert soil, like arlite, rock wool and coir. Another similar system is aeroponics, based on vaporizing the roots with a thin foil of nutrient solution where they hang over. Among the previously mentioned soil options, the ones including gravel and sand are easily obtained, but they’re not reusable, and they are difficult to clean. Other options are rock wool, coir and oasis cubes, lava rocks and, most popularly, pop rocks or expanded clay; here you have a brief guide/hydroponic grow handout:
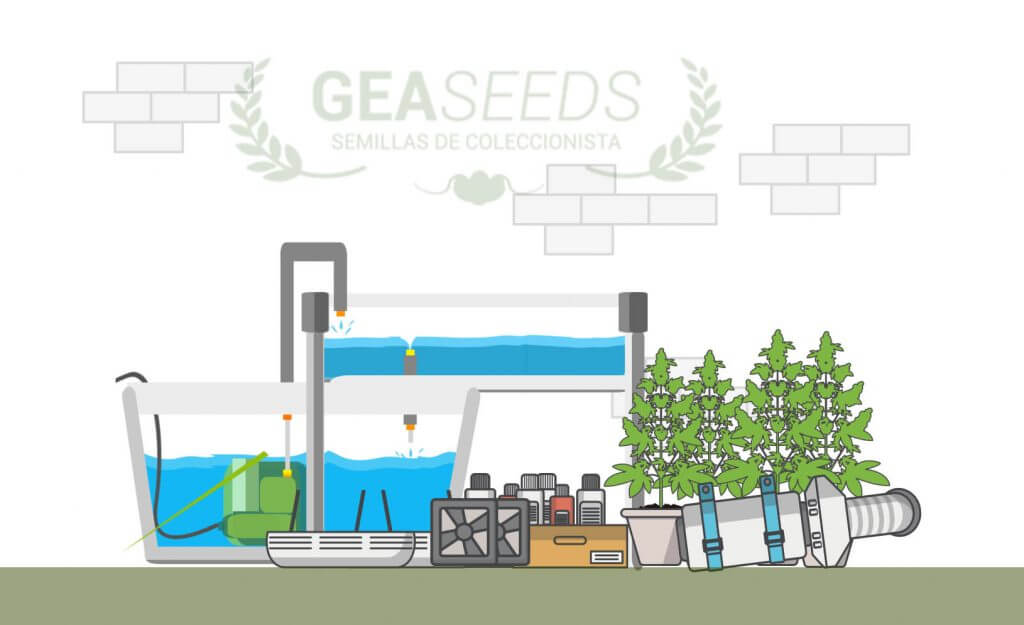
What do we need?
First of all, we have to choose an inert soil. Following up, we’ll explain how to deal with hydroponic crop on rock wool soil or coir slabs. Secondly, we must have:
- Base wear, like a metal structure or plastic structure, or a wooden table.
- 5 coir or rock wool slabs.
- Approximately 20-25 rock wool blocks with 7.5cm diameter.
- Duct tape.
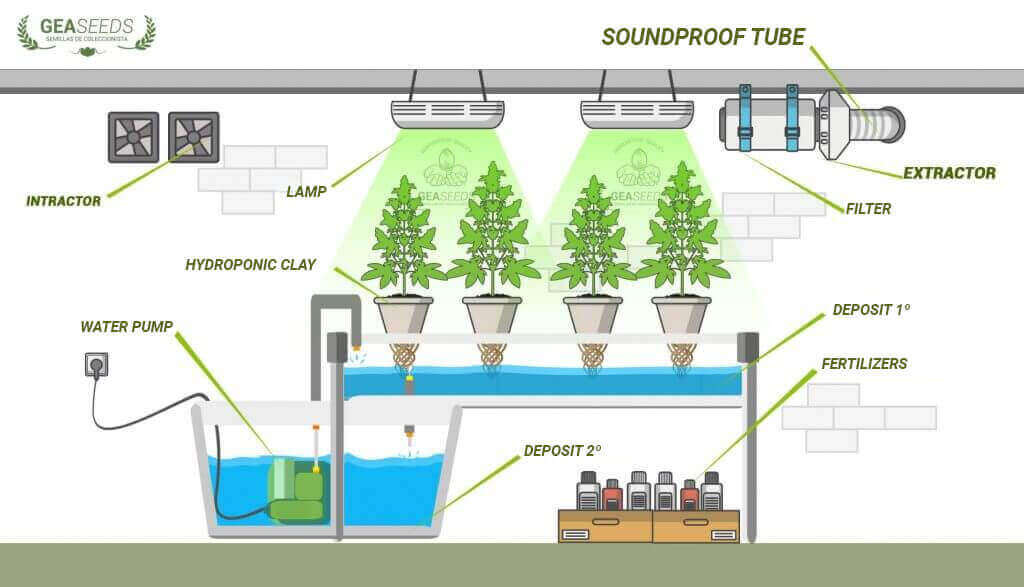
These are the basic cropping elements, but the most important thing in a hydro crop is irrigation system, providing everything to the plants, regarding a proper development of their vital functions. In order to arrange the automatic irrigation system in a one-square-meter cupboard, we will need:
- Water pump of 12001/h with flow reduction.
- Crop tray 1.00 x 1.10m.
- 90 l deposit.
- 20mm hose, 1 meter approx.
- A pair of elbows.
- A pair of Ts.
- 20 mm dripping irrigation tube, 5 m approx.
- Water metal flanges, 14 units.
- Microtubes, 25 units.
- Droppers, 25 units.
- Taps for branch end, 3 units.
- Digital timer for water pump.
- 40l deposit for sewage.
This is what we need, although there’s a wide range of crop kits providing all the necessary equipment. On our website, we recommend to get the elements independently, or by means of more individual kits, adjusting to our needs and saving some money.
What are the necessary steps?
When having the whole material, next step looks less important, but it’s vital for the correct functioning of hydroponic crop. We are referring to cleansing and disinfection of the zone where we’re going to establish the crop. Disinfecting the space for the crop table becomes necessary; otherwise, we could obtain infection problems which could finish our crop.
When totally cleaning the space, we’ll assemble the automatic irrigation system for five slabs with five cuttings, that is, our hydro crop will have 25 cuttings.
How to assemble the automatic irrigation system?
The first step’s taking the 20-cm dripping irrigation tube and cutting it into four one-meter-long pieces. One of them will be used to create the main water branch that will conduct the liquid and the nutrients to the three secondary tubes. Following up, we cut the main branch into three pieces: the first one, 20 cm; the second one, 40 cm; and the third one, 20 cm. Once these cuttings are made, we’ll place a T in them, and, at the end of the last one, we’ll place an elbow. All these connections have to be fixed and sealed by means of metal flanges. This will avoid leaks in the irrigation system, so you’ll take profit of every drop of water.
Once we have fixed the main branch with metal brides, we’ll place the 3 tubes of 20mm diameter and one meter long, sideways. These 3 tubes, functioning as secondary branches, need to be finally sealed with 3 taps.
Micro tube assembling
Next, we’ll deal with the assembling of the micro tubes, directly inserted in the 20mm tubes functioning as secondary branches. Then, we’ll have to make a little hole in order to insert the micro tubes. The hole can be made with a punch, and it has to be a tiny hole, for the micro tubes to forcedly enter; otherwise, when the water pump makes pressure, they’ll be ejected and we’ll waste our work.
Once this is clear, we’ll make 10 holes to insert 10 micro tubes in the first branch; in the second branch, we’ll make 10 more holes; and, thirdly and lastly, we’ll make 5. For every hole, we’ll place a micro tube and, on the edges, we’ll place a threaded dropper of 41/h. These droppers will let us control the liters/hour we provide to the crop.
Lastly, a hose has to be connected to the main branch, and, on the opposite edge, we’ll have to connect the water pump previously placed in the interior of a 90l deposit, placed under the crop table.
When dealing with these procedures, we’ll have completed the first step: assembling the automatic irrigation system.
How to assemble the sewage system?
When assembling the automatic irrigation system, the next step’s assembling the sewage system. It’s very important, because it will help us to recover the exceeding irrigation water.
The first step’s placing the crop tray on the holder, and we’ll place the rock wool or coir slabs, depending on the soil we had chosen. The slabs have to be distributed so that the first one coincides with the first branch, and so on till the fourth branch. Following up, just under the sewage, we’ll place the 40l recovering deposit, for us to profit the tray draining.
Once these steps are dealt with, the system’s totally assembled, and it just needs to be connected to the digital timer and to the automatic irrigation pump. From now on, we already have the whole hydroponic system, ready to function and obtain the best crop in our life. There are hydroponic systems consisting of a sole pot with an underneath deposit, much easier and cheaper, although, obviously, they’re just available for one pot, so we’re just able to crop one plant.
Results
When we start to see the results we obtain by means of hydroponic cropping, we wouldn’t want to switch to a different system. If we provide the necessary nutrients to the plants, with its precise amount, the plants will grow fast and will flourish fast, abundantly and producing improved buds.
In order to obtain these results, even though the irrigation system is set and automatic, we have to keep the track on the plants every day, providing the necessary nutrient amount. For that, we can follow some online charts. Next, we show you some charts, interesting for basic growers. Besides, when getting to run it properly, you can improve and adapt these plants to your personal needs and queries. We have to pay attention to the nutrients we provide, and to PH water level or to sterilization of the cropping zone.
Growing/Flowering chart: EC, PH, Temperature and Humidity
Parámetros |
Crecimiento |
Flowering |
|||||
|---|---|---|---|---|---|---|---|
Semanas |
1, 2 y 3 | 4 y 5 | 6 y 7 | 8 y 9 | 10 y 11 | 12 | 13 |
EC |
0,7 – 1,4 | 1,3 – 1,8 | 1,4 – 1,9 | 1,6 – 2,0 | 1,7 – 2,2 | 1,7 – 1,1 | 0,4 |
pH |
5,5 – 5,8 | 5,9 – 6,2 | 6,0 – 6,2 | 6,0 – 6,2 | 6,0 – 6,2 | 6,0 – 6,2 | 6,0 – 6,2 |
Tª mín -máx |
20 – 27 | 20 – 27 | 20 – 27 | 20 – 27 | 20 – 27 | 19 – 25 | 19 – 25 |
Humidity % mín máx |
45 – 70 | 50 – 70 | 50 – 70 | 45 – 70 | 45 – 55 | 40 – 50 | 40 – 50 |
Nutrients for marijuana hydroponic grow
Similarly to soil, in hydroponics we can find many brands of products with specific fertilizers for growing stage (vegetative) and flowering stage (generative).
If you don’t have solid feedback, you’re a beginner or you don’t want hard times studying the compositions of every brand, you should use the whole hydroponic-grow range – Hesi, Canna, Atami, but no root booster from one brand and growing booster from another brand (for flowering, use compost from 2 different brands).
In the above chart – EC, PH, Temperature, Humidity, values aren’t exact: you have to know your growing strains properly, even doing slight variations in your management – you would get to know your best EC/temperature/humidity for your favorite strain, making the most of it.
Your fertilizers (nutrients) will influence EC and PH – control them properly, adding acidity correctors if necessary; indica strains tolerate 2-2.2 EC, and, sativa strains, 1.7-1.8 – reading professional handouts is interesting.
There are specific fertilizers for soil, for hydroponics and for both – read the label properly to make sure you’re using good compost (if making mistakes, maybe the provoked problem wouldn’t be solved).
PH
PH controlling will make the plants, and their roots, absorb and process the nutrients we provide. If we don’t measure PH properly, the plant won’t be able to absorb the nutrients, and its growing, flourishing and production will be stopped. Controlling PH levels in hydroponic system’s easy and necessary. The best option’s maintaining PH 5.5-5.8, so we have to measure PH daily and change the solution weekly. This task could become difficult if we crop on ground, but, with hydroponics, it’s simple since, differently from earth, there’s not any bacterial ecosystem producing changes in PH levels.
How to assemble home-made hydroponic marijuana system (video)
Conclusion
Summing up, hydroponic system’s one of the most efficient and productive systems we can use for marijuana crops. Besides, there are many methods and ways to deal with this type of systems. We can have ready-to-use kits, assemble it on our own buying the necessary elements, home-making or getting a hydroponic pot. All these options provide the possibility of producing great-quality marijuana, following simple steps. Don’t care about so-called complexity around hydroponic crop; try it, and you’ll realize that it’s much easier than expected and, what is more, the results will be outstanding.