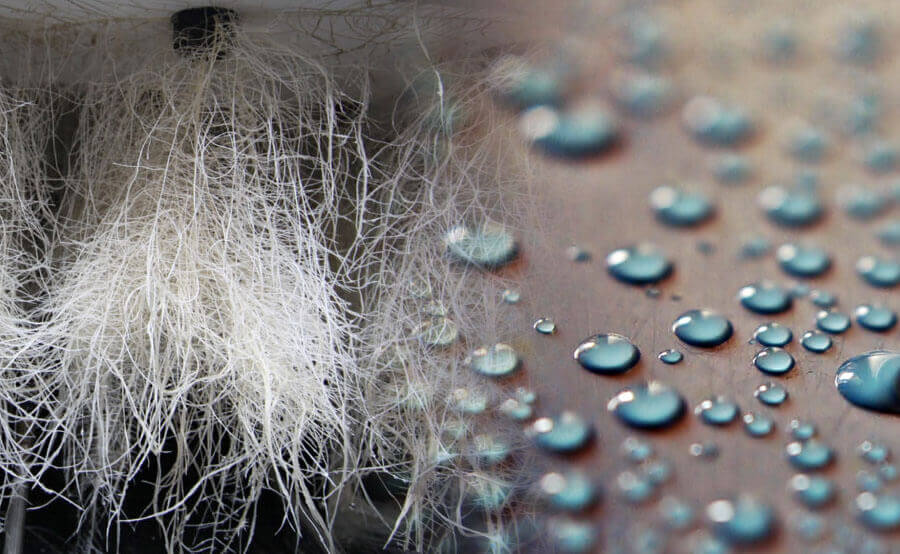
Aeroponic growing is the best top current hydroponic system. This top current agricultural system was invented in Italy, in Pia University, by Dr. Franco Massantini; originally, it was a vertical system, but its innovative design gave rise to aeroponics in horizontal growings. This original Massantini’s system consisted of a P.V.C. cylinder, in vertical position, full of holes to introduce the plants, so the roots grew inside the cylinder, totally dark and exposed to the air: the roots do not grow in an anchoring soil, but suspended on nowhere.
Compared to hydroponic, the main advantage is that it consumes less water and energy per growing square meter; in fact, aeroponics needs ten times less water than any other conventional growing system.
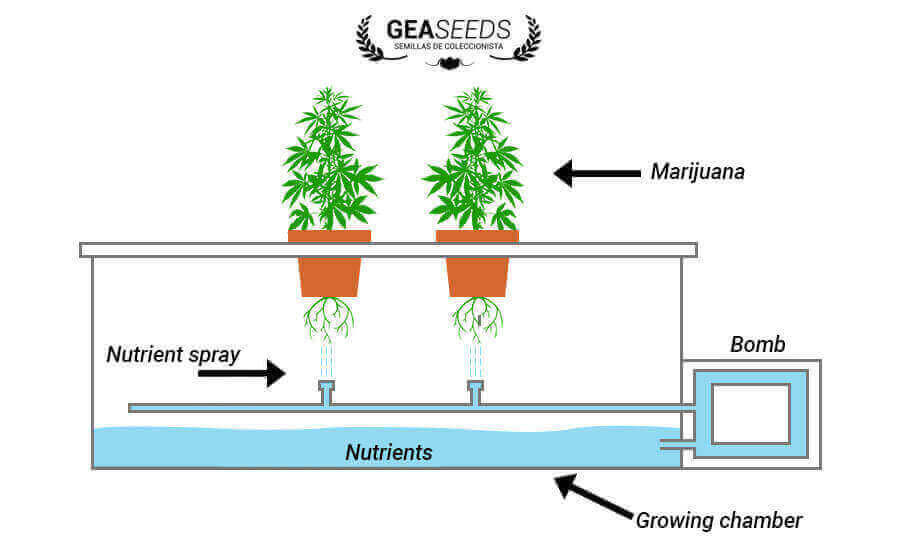
How does an aeroponic system work?
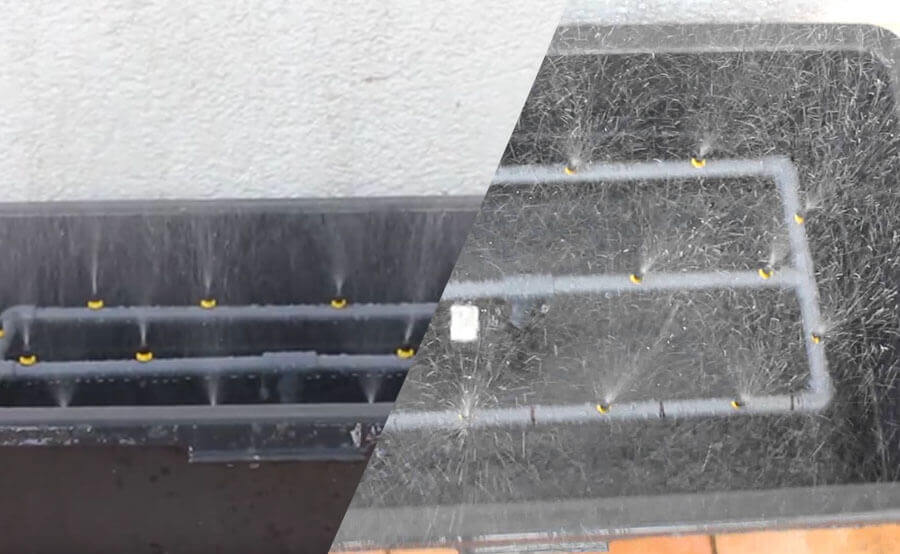
In an aeroponic system, the plants grow in grid pots; the roots hang on a spraying system. This system sprays the roots at high pressure in intervals, with a mixture of water and nutrients. These intervals are active and inactive; inactive intervals are the pause moment, so the circulatory system absorbs the nutrients, and active intervals provide water and nutrients to the plants.
Water and nutrients are in a close-loop system; grid pots have some lids through which the plant stem leaves, reducing the risk of evaporation and excess in nutrient concentration. This system also avoids light filtration which could affect the roots, and prevents algae generation, providing a disease-free environment. The result is a much more productive system, with less space and cost.
Advantages
- – The roots grow in the air; the oxygenation of the root system is much higher than with any other system, because the percentages of oxygen in the air are 20,000 times higher than the concentration of that gas in water.
- – Less water consumption, because the evaporation level is much more reduced than the level in the other systems.
- – Notorious reduction of the possibilities of the outbreak of diseases, like root rot.
- – More growing plants in less space.
Disadvantages
- – Special attention; if the power fails, the vines do not have any water or nutrients for maintenance, dying all in a short span.
- – You need sprays, spreaders, nebulizers and other gadgets to moisten and provide the necessary nutrients for the roots.
- – While the roots are developing, you have to be very aware of possible dry spots on the zones dew cannot reach.
- – High cost of the facility.
- – The parameters have to be precisely controlled: water access, pH, EC, nutrient levels, air exchange or water temperature are some of the most important parameters.
Required equipment
The following list shows the required equipment to make your own aeroponic system:
- – 1.5 m of 3/4″ PVC tube
- – 100-liter water tank
- – 3/4″ PVC T unit
- – 2 T connectors of 3/4″ PVC (with the sides open)
- – 5 90-degree 3/4″ PVC elbows (with the sides open)
- – 1/2″ x 6″ long splice
- – 300 gal/h water pump
- – 12 1/4″ sprinkler heads, with a 360-degree circular spray pattern
- – 6 grid pots, up to 3.75 inches
- – Foam inserts – similar size to pots
- – PVC glue
- – Primer
- – Plumbing teflon tape
- – Primer paint
- – 1 liquid timer
Required tools
- – Drills and drill bits
- – Plastic saw
- – Hole saw or jigsaw
How to make your own aeroponic growing step by step
Steps to make the structure
- Place the pots evenly on the Rubbermaid tank lid, and mark the contours; cut the marked contours for the pot holes and leave a notch for the pump cable.
- Place the 90-degree connectors at every corner of the tank bottom; place a T unit at the center of each rectangle side, and T connector and 1/2″ screw-on connector are placed between two T connectors – the screw-on edge has to be headed to the tank bottom.
- Join the connectors with the cut-to-size PVC tubes; make six longer pieces to join the T connectors and the 90-degree connectors at the corner, and make two short pieces to join the two center T connectors with the T unit headed to the tank bottom: lastly, drill the six longer PVC sections, in order to leave some holes for the sprinkler heads.
- Install the tubes and make sure the hole for sprinkler heads is aiming at the tank top; cover the inside of the connectors, and the outside of PVC tubes, with primer paint. Once dry, seal the tube edges with PVC glue, and slip them into the connectors; when sticking the tubes and connectors, adjust and orient everything properly before they get dry.
- Connect the sprinkler heads to the PVC tube and connect the 6-inch x ½ inch splice to the edge of the screw-on T connector and the pump; pour water into the tank and check the system. Once everything adjusted, connect the electrical cable to the pump, slipping it through the notch you made on the Rubbermaid tank lid.
- Add the nutrients, measure and adjust water pH and EC; fill the pots with rinsed hidroton or extruded clay, and place them on the lid holes. Lastly, place the plants in their corresponding pots and start the pump, connected to a cyclic timer.
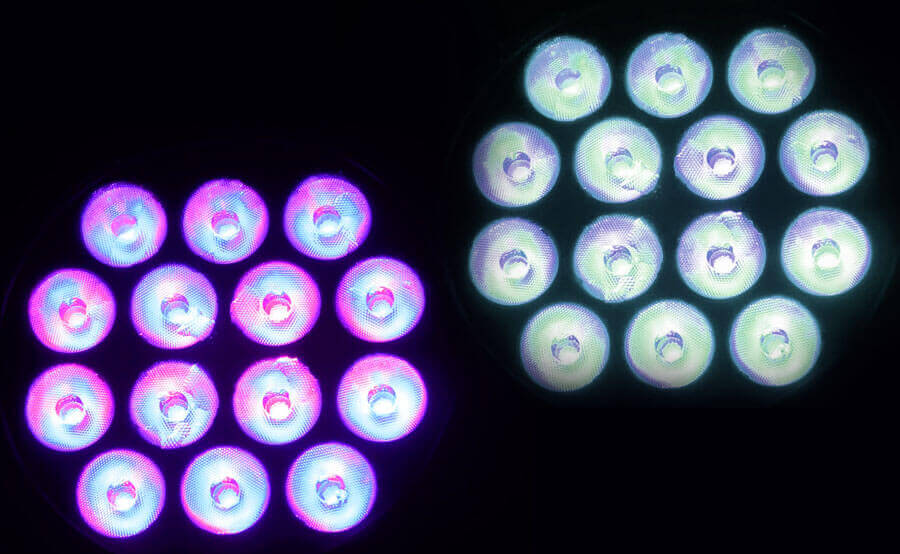
Luminaire
The chosen light does not have to excessively increase the temperature of the growing space and the tank water; if the light increases the water temperature over 24 degrees, you will have to install a cooling unit, so, in this kind of systems, many growers prefer to use colder lights, like LEC or LED luminaire.
Nutrients
Firstly, decide if you are going to use chemical or organic nutrients; once you choose the fertilizer you are going to use, search online the concentrations suggested by the producer and other growers; Gea Seeds suggests a quarter of the producer’s recommended quantity, and, this way, keep increasing the dose, depending on the behavior of the vegetables.
Keep in mind the nutrients have to include macronutrients, like nitrogen, phosphorus and potassium, as well as micronutrients, like zinc, boron, sulphur or magnesium. For a controlled nutrient application, use an EC or TDS meter, according to the recommendations of the nutrients; if in ppm, TDS is better, and, if in EC units, obviously an EC meter is better.
Lastly, your tank evaporation is very important; the more water evaporation, the more nutrient density.
Water
The main water parameters are pH – 5.5-6.5, temperature – 18-24 degrees – and change frequency; it is very important that light does not enter the tank, because, otherwise, algae would be generated, handicapping the system and consuming the nutrients for the plants. Try to adapt everything to reduce the water temperature to the maximum, since a tank cooler is too expensive; on the contrary, the heaters are much more economically accessible.
Air
Air, similarly to the rest of growing systems, is a special parameter for a healthy, vigorous and productive growing; these parameters consist of maintaining the temperature between 21 and 26 degrees, with the air flowing constantly. An extractor – expelling the stale air, and an interactor – introducing air in the growing room – help maintain healthy air for growing; besides, a fan is useful, generating a slight swing on the vegetative structure of the vines: the stems and trunks, and the structure of the plants, will get stronger, so the weight of the buds will be hold better, and their production will be increased.
Another benefit when maintaining the air clean is that the risk of different kinds of fungi and algae is reduced considerably, since the air contains less humidity; lastly, a CO2 generator can be added – vine growing is even better.
Conclusions
If you have followed all the previous steps verbatim, now you have made your own aeroponic growing; just clean up the whole structure, preventing it from future problems, and put all your effort and dedication to the growing of your beloved vines. When in doubt, just contact our customer-care service, or look up any of the hundreds of the existing handouts and growing guides; Gea Seeds wishes you all the best in your new adventure.